Apple MainStage and Native Instruments Kontakt have a history of not getting along with each other. Google “Kontakt with MainStage,” and you’ll be bombarded with dozens of support threads without any real solution.
In this tutorial, you’ll learn about four different ways to use Kontakt with MainStage. For each method, I’ll present an in-depth walkthrough followed by its pros and cons.
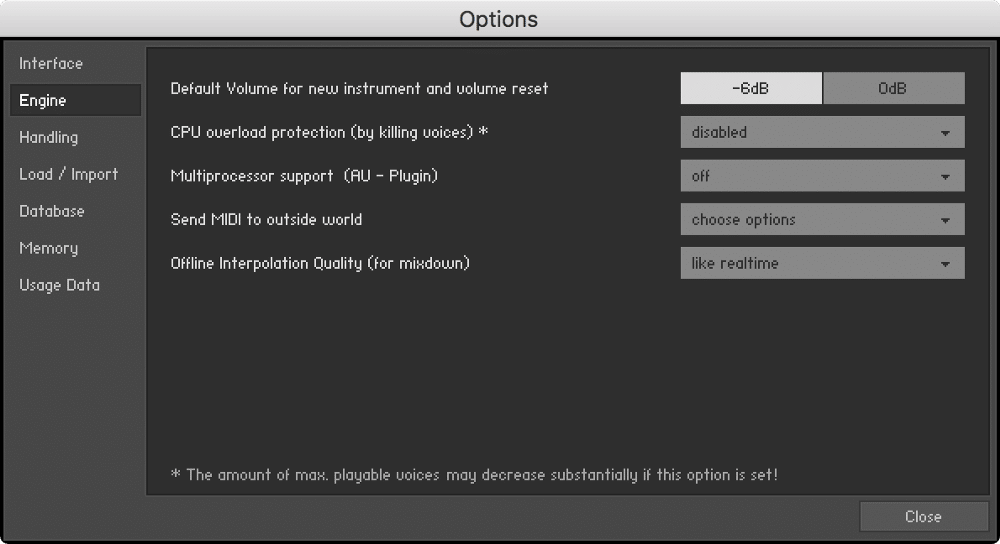
Multiprocessor support (AU — Plugin) should be disabled.
1. Individual Instances of Kontakt
The simplest way to use Kontakt with MainStage is creating an individual instance for each sound. In other words, each MainStage channel strip is dedicated to one specific Kontakt sound library. In the example below, I’ve created two channel strips — one for piano (The Gentleman), and one for strings (NI String Ensemble).

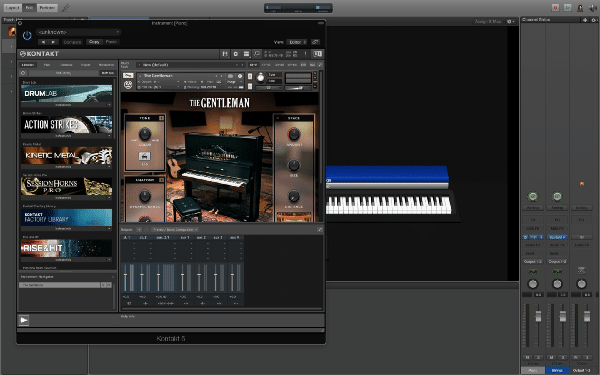
A setup like this is perfectly fine for small concerts with minimal usage of Kontakt libraries. With that said I don’t recommend this method because as a programmer, one should always strive for resource optimization.
2. Multitimbral Instance of Kontakt
In electronic music, multitimbrality refers to a synthesizer’s ability to produce more than one sound or timbre at any given time. This is typically achieved by sending the same control information (note on, note off, etc.) to different tone generators or oscillators via MIDI channels.
Software instrument channel strips in MainStage are 16-part multitimbral. In practice, multitimbrality is a very powerful concept. Instead of loading sixteen separate instances of Kontakt to host sixteen sample libraries, it’s much more efficient to address sixteen sample libraries in a single instance of Kontakt over sixteen MIDI channels.
Below are two diagrams.
Four individual instances of Kontakt.
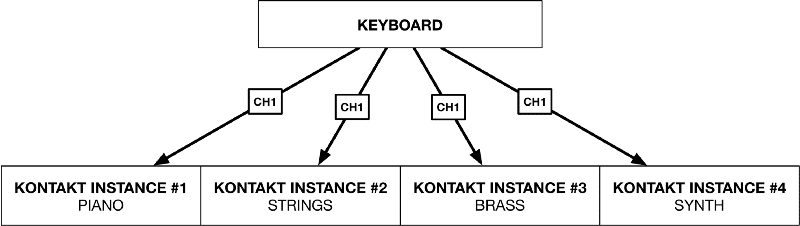
One four-part multitimbral instance of Kontakt.
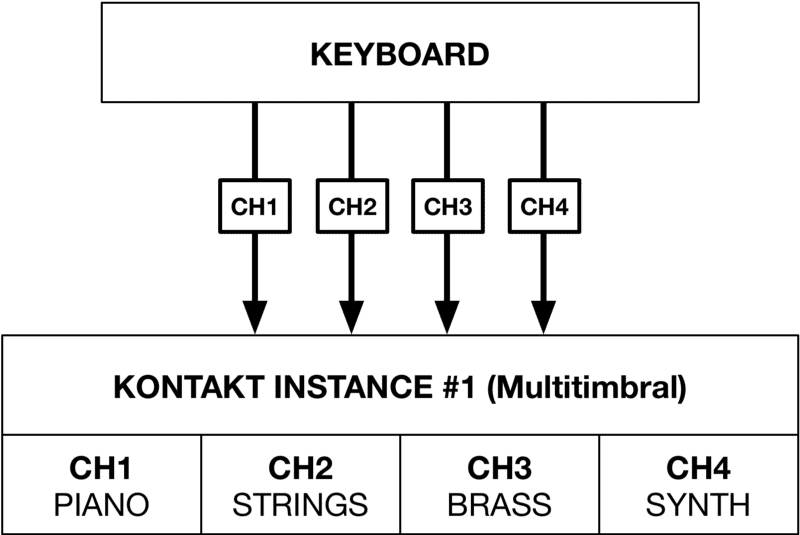
Here’s the basic concept.
- Create a SOUNDS folder with a software instrument channel strip containing a “Kontakt bank,”
- Alias the channel strip, and configure multitimbral settings to address different sounds in the instance of Kontakt.
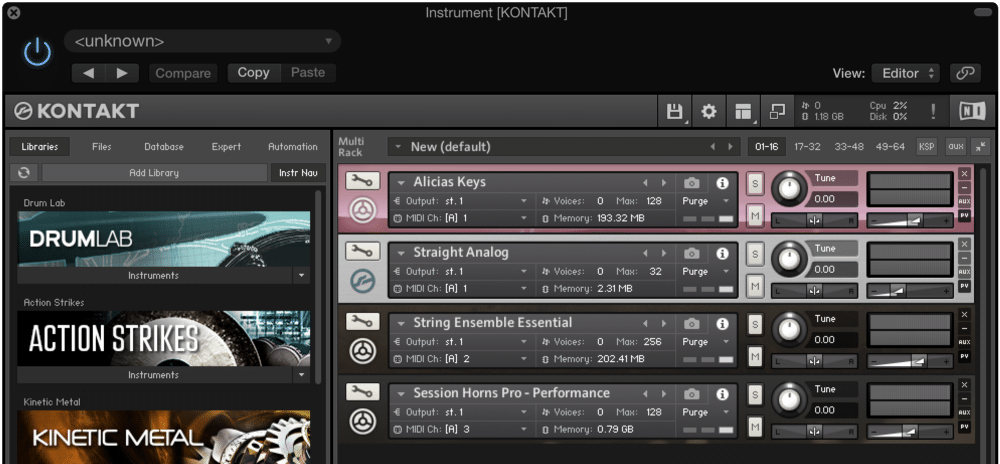
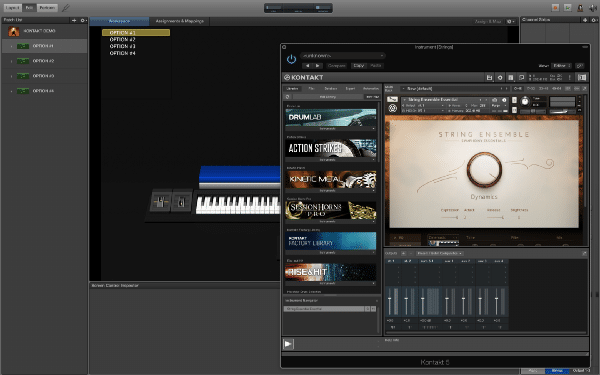
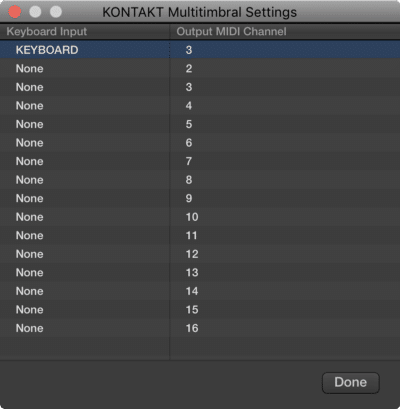
Look at the MIDI channel assignments.
- Alicia’s Keys and Straight Analog are receiving on Channel 1.
- String Ensemble Essential is receiving on Channel 2.
- Session Horns Pro is receiving on Channel 3.
Here’s what I want to do.
- Layer Alicia’s Keys and Straight Analog across the whole keyboard.
- Layer String Ensemble Essential from C3 to the top of the keyboard.
- Layer Session Horns Pro from the bottom of the keyboard to B2.
To transmit MIDI data to different channels from MainStage to Kontakt, navigate to the MIDI Input tab in the** Instrument Channel Strip Inspector**.

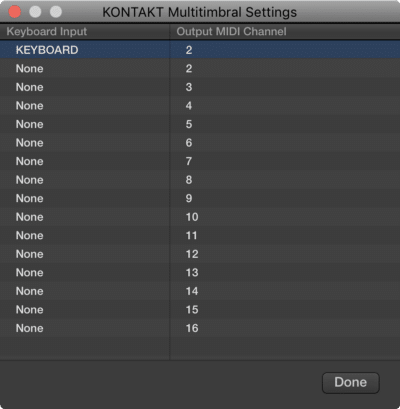
- In the first channel strip, map KEYBOARD to MIDI Channel 1.
- In the second channel strip, map the KEYBOARD to MIDI Channel 2.
- In the third channel strip, map the KEYBOARD to MIDI Channel 3.
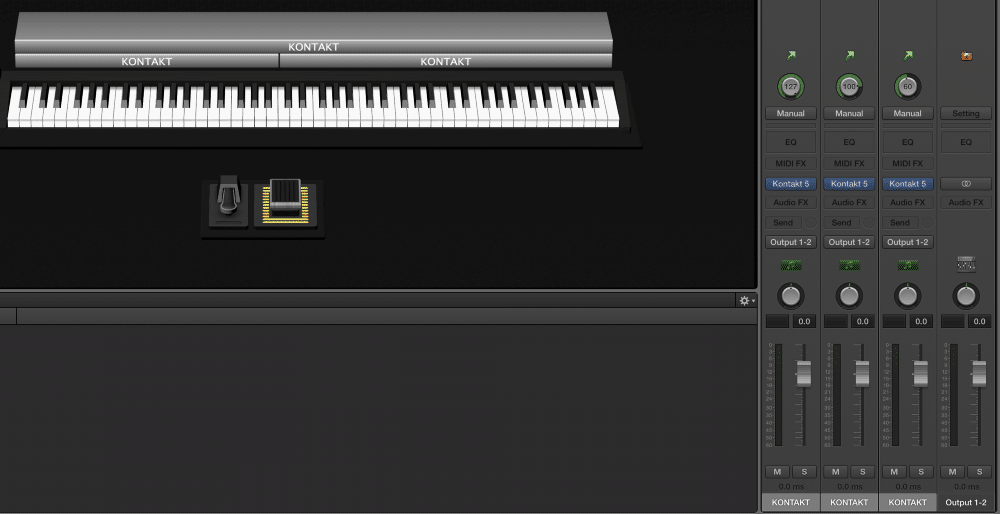
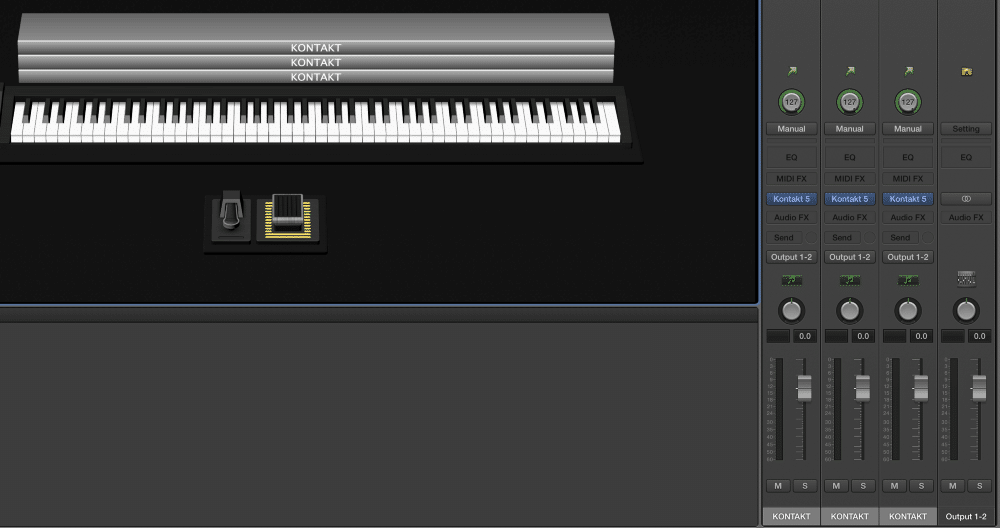
Keep in mind a channel strip’s name and color apply to all aliases. This means it’s not possible to give different names to the channel strips in the above screenshot. Stay organized by sticking to a single protocol and workflow. For example, I always use ascending MIDI channels from left to right. In other words, the left-most alias is Channel 1, the middle alias is Channel 2, and the right-most alias is Channel 3.
Multiple aliases of the channel strip located within one patch are globally affected by the volume fader. Thus, moving the volume fader on the alias for Channel 1 will have the same effect on Channel 3. A workaround is to use the expression dial at the top of the channel strip to balance volume. In the screenshot above, you can see Channel 1 is set to 127, Channel 2 is set to 100, and Channel 3 is set to 60.Even with proper programming technique, performance issues can still arise when using multitimbral instances of Kontakt in MainStage.
On a recent show, I decided to use a few Session Horns presets in a multitimbral setup. This resulted in laggy patch changes (the longest change took a full five seconds) and occasional audio glitches. Fortunately, the horns ended up getting cut in a new orchestration.
With that said, I have to assume this was a MainStage/Kontakt compatibility issue because the dozens of instances of Keyscape and Omnisphere in the same concert worked flawlessly.
3. Kontakt in Standalone Mode
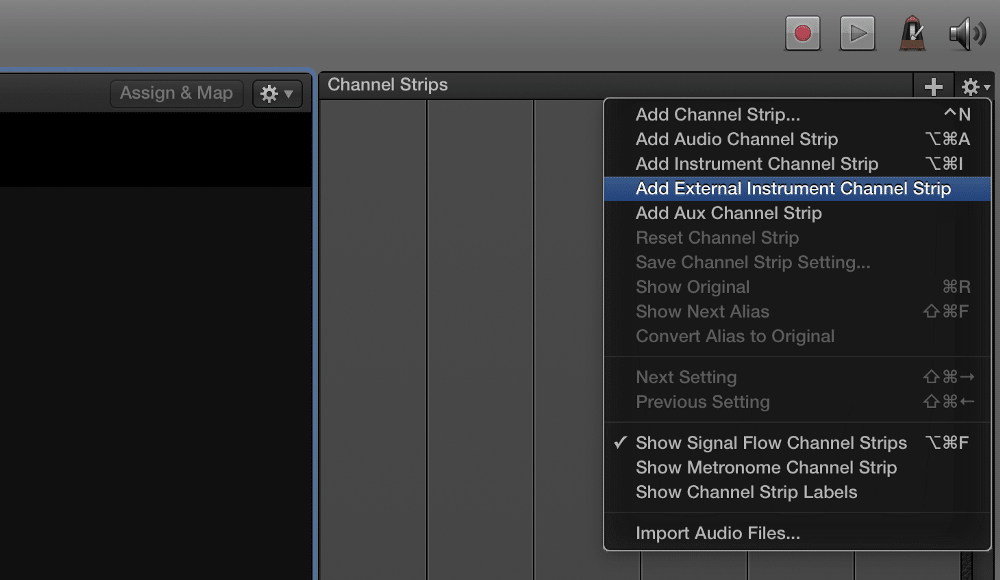
In MainStage, external instrument channel strips are used to control tone generators outside of MainStage — often hardware synthesizers. However, external instrument channel strips can also be used to control software — the Kontakt standalone application.
The first task is to figure out how to send MIDI data from MainStage to Kontakt. There are two ways to do this — software and hardware.
IAC Driver
MacOS ships with IAC (Inter-Application Communication) Driver, a virtual MIDI interface that enables transmission of MIDI data between different pieces of software.
Hardware Loop

iConnectivity mio10 USB MIDI Interface
In this tutorial, I’ll be using the IAC Driver because it’s free.
First, open the Audio MIDI Setup app located in ~/Applications/Utilities. Next, press ?2 to open the MIDI Studio. Fimnally, click on the IAC Driver.
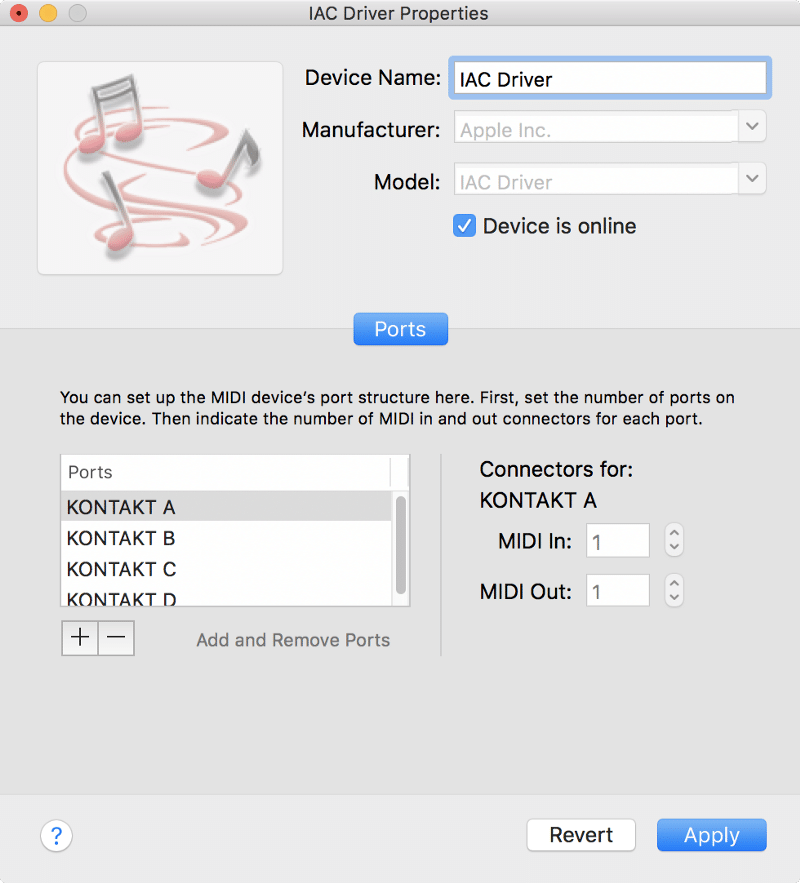
Click on the dialog box next to “Device is online” to activate the IAC Driver. Next, create a few MIDI ports by clicking the the + button. Double click on the port name to rename it. I’ve created four ports and named them KONTAKT A, KONTAKT B, KONTAKT C, and KONTAKT D.
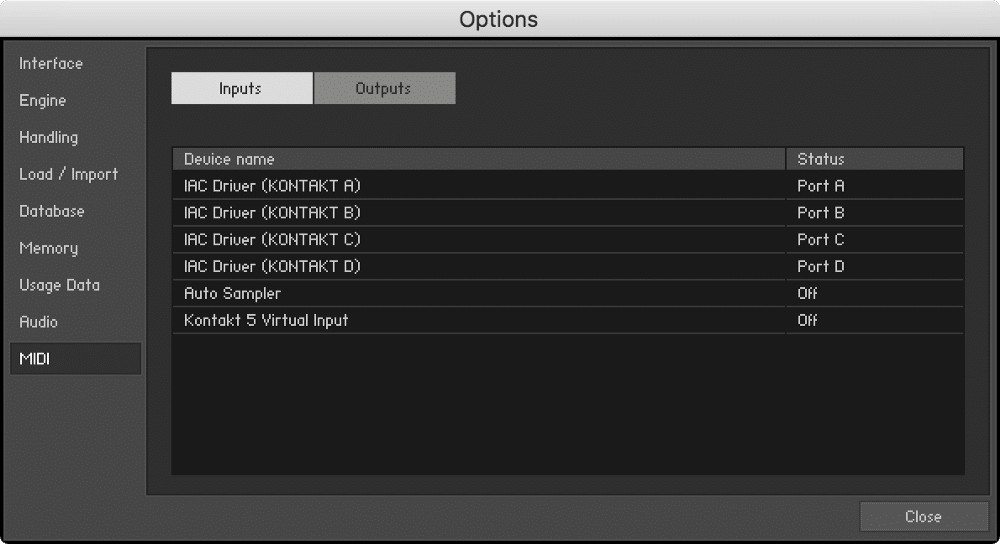
In the inputs section, map the IAC Driver ports to their corresponding ports in Kontakt. Leave the outputs as is.
Now, it’s time to create a multi in Kontakt. A multi can contain up to 64 sounds split over four pages (1 – 16, 17 – 32, 33 – 48, 49 – 64). To keep myself organized, I like to think of these four pages as (KONTAKT A, KONTAKT B, KONTAKT C, and KONTAKT D).
In the screenshots below, you can see…
- Alicia’s Keys is in KONTAKT A receiving on MIDI Channel 1.
- String Ensemble Essential is in KONTAKT B receiving on MIDI Channel 2.
- Session Horns Pro is on KONTAKT C receiving on MIDI Channel 9.
- Straight Analog is on KONTAKT D receiving on MIDI Channel 16.


Now, let’s move into MainStage.
Before continuing on, it’s important to map all the onscreen elements to something other than “All Devices” to avoid an IAC MIDI loop.
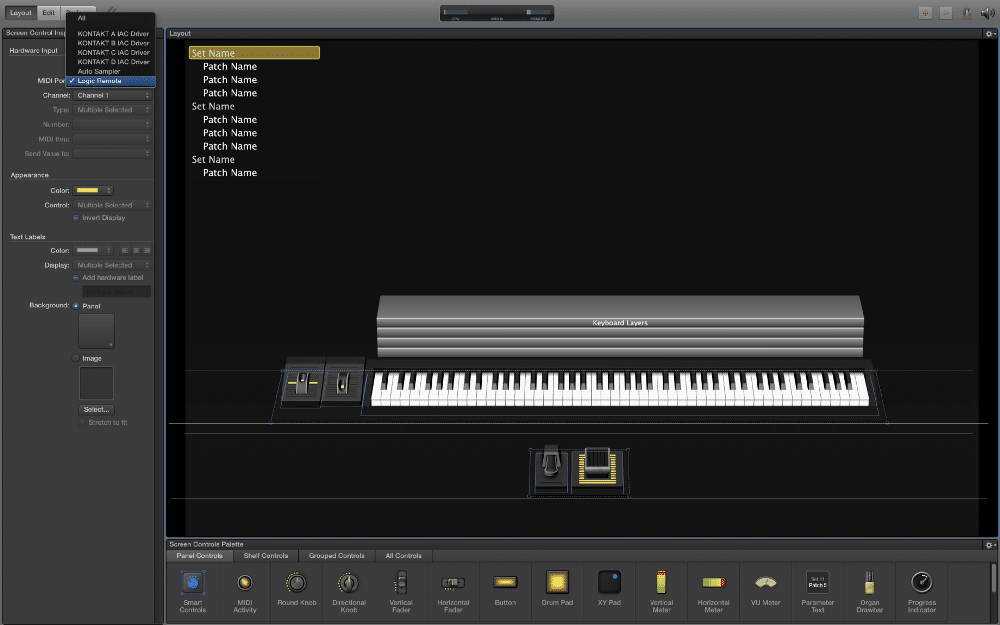
The architecture of an external instrument channel strip is slightly different from the software instrument variation. There are two additional boxes above the expression dial — one for MIDI port and one for MIDI channel.
I’ve configured the four channel strips as follows.
- Piano transmits on Channel 1 via KONTAKT A.
- Strings transmits on Channel 2 via KONTAKT B.
- Brass transmits on Channel 9 via KONTAKT C.
- Synth transmits on Channel 16 via KONTAKT D.
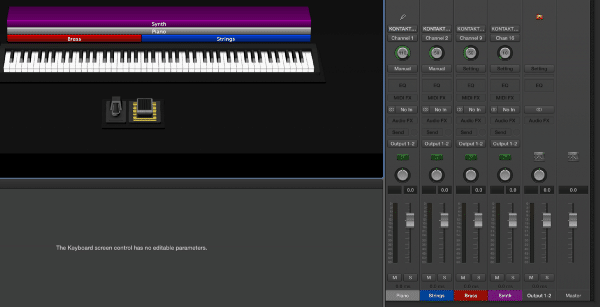

As you may have noticed, these MIDI output assignments correspond directly to Kontakt’s MIDI input settings.
Be aware that moving the volume faders will have no effect because audio doesn’t originate from MainStage in this setup. Instead, I’ve used the expression dials to mix the patch.
4. The “Right” Way to Do It
Option #3 has one glaring weakness. It doesn’t allow for effects processing inside MainStage because audio is being routed from Kontakt straight to your sound card or audio interface.
Thus, the solution is to route the audio from Kontakt to MainStage. Similar to the MIDI loopback, there are a few solutions.
Soundflower
Soundflower is an OS X kernel extension that adds a “virtual audio interface” to your computer. Similar to the IAC Driver, Soundflower lets you route up to 64 channels of audio between applications.
Software Mixers
Higher end audio interfaces will often have loopback capability in their respective software mixers. Audio interfaces from RME, MOTU (AVB), and iConnectivity support this feature.
ADAT Loopback
Audio interfaces with ADAT I/O can also be used for near-zero latency loopback. Since ADAT is a completely digital connection, there won’t be any latency penalties from AD and DA conversions.
In this tutorial, I’ll use Soundflower.
The latest version of Soundflower (that works with MacOS Sierra) can be downloaded here.
After installing Soundflower, navigate to System Preferences/Audio.

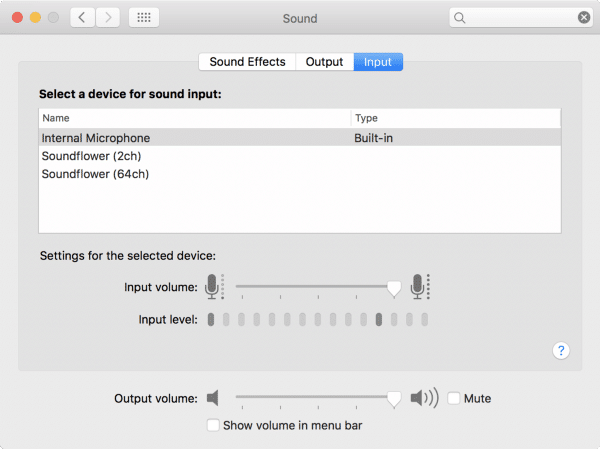
- Soundflower (2ch) — Stereo I/O
- Soundflower (64ch) — Multichannel I/O.
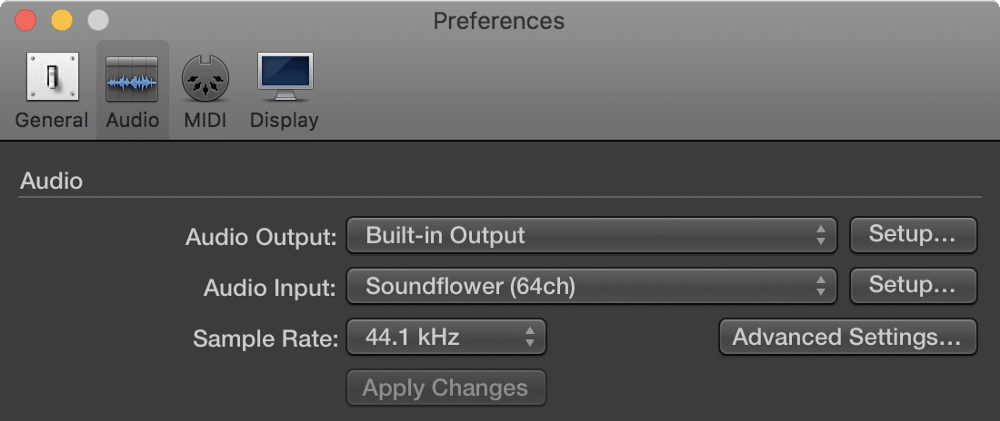
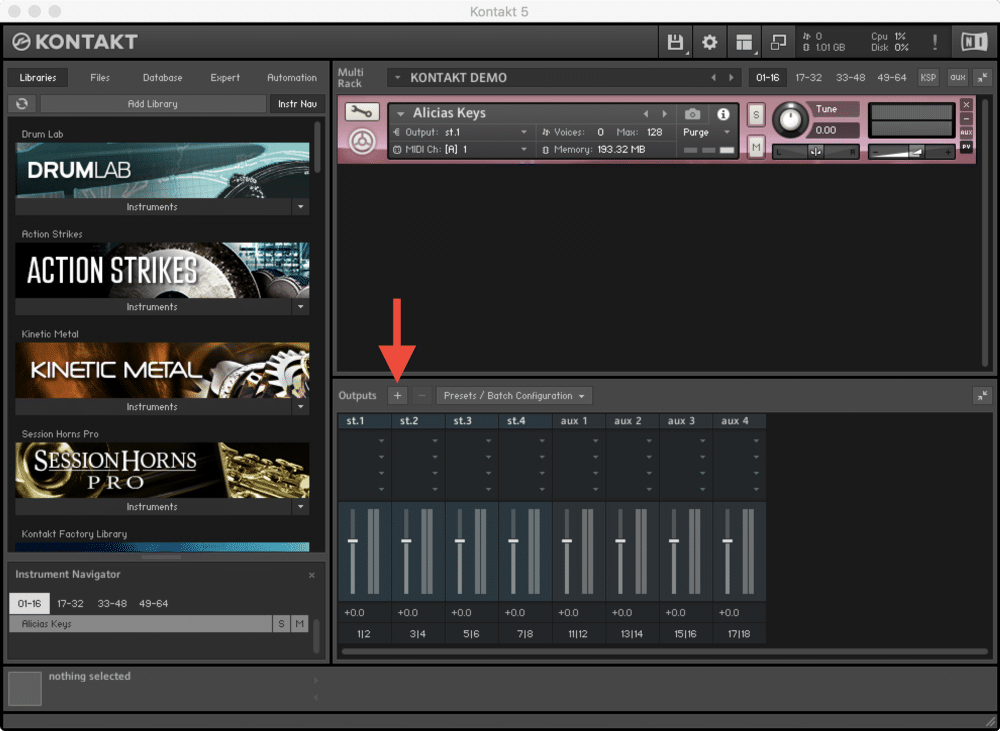
I want all four of my sounds to have their own discrete stereo channels, starting with Soundflower (64ch) Channel 1.
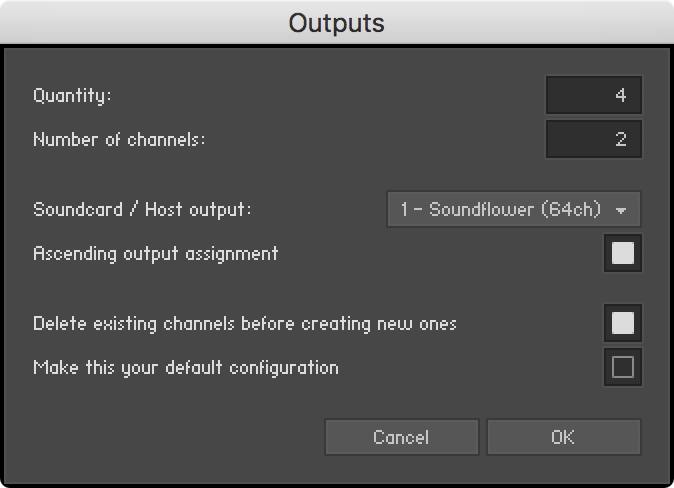
Next, I assigned each instrument to a specific output pair.
- Piano on St.1 (1 – 2)
- Strings on St.2 (3 – 4)
- Brass on St.3 (5 – 6)
- Synth on St.4 (7 – 8)


Next, I set the corresponding inputs for each channel strip in MainStage.
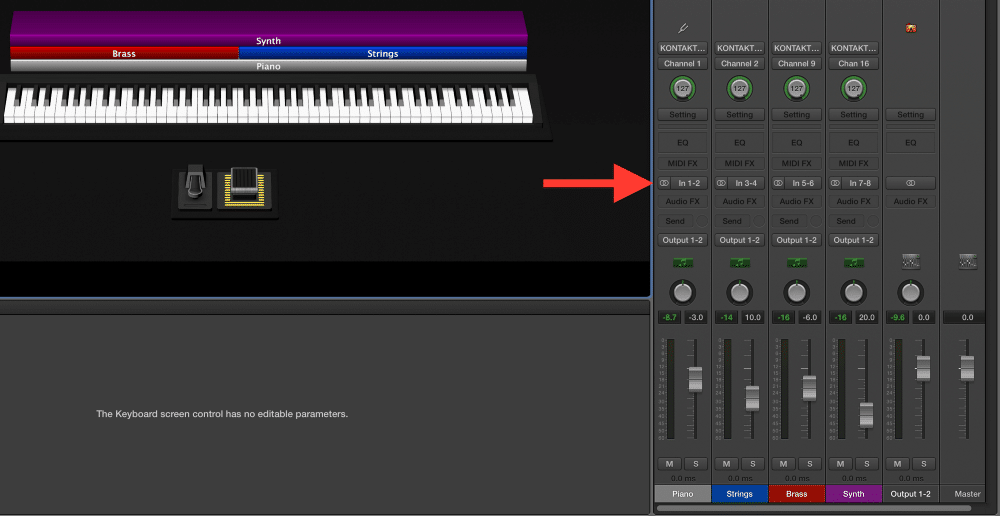
Notice my expression dials are all at 127 now. Since audio is being routed through MainStage now, I can use the faders to control volume.
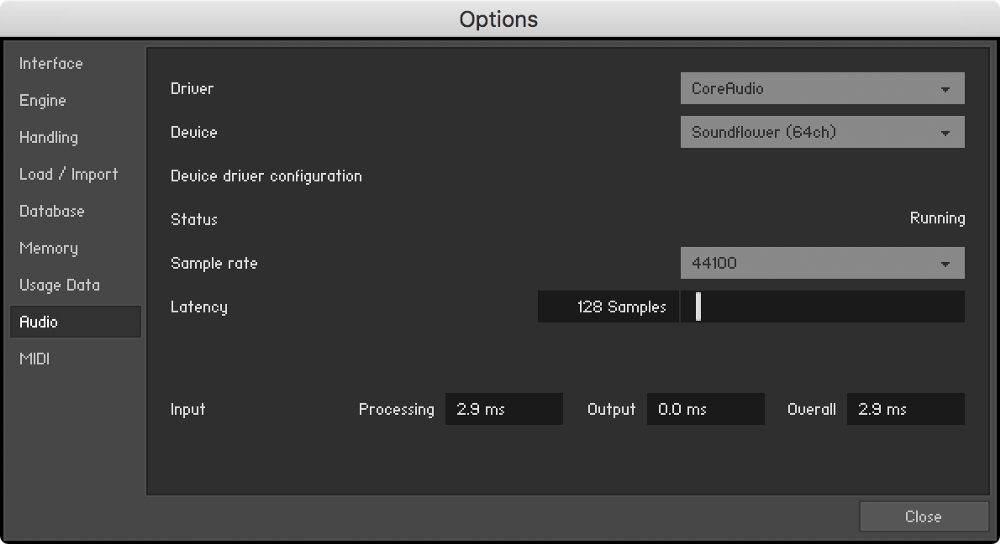
Be aware that this method, while the best option by far, isn’t completely foolproof. MainStage and the standalone Kontakt app have individual buffer size settings, and a compromise must be made somewhere.
For example, if I’m using MainStage only as a control interface and FX processor for Kontakt, I’d be comfortable with the following buffer settings.
- Kontakt — 128 samples
- MainStage — 64 samples
If I decide to use Keyscape in MainStage along with Kontakt as an external instrument, these setting would be more realistic.
- Kontakt — 128 samples
- MainStage — 128 samples
If I decide to use Keyscape, Omnisphere, and Sylenth in MainStage along with just one string sound in Kontakt standalone, I may use these settings.
- Kontakt — 64 samples
- MainStage — 128 samples
The key is to play around with different buffer settings to find the lowest possible combination while maintaining stability.
Option #4 offers the optimal combination of stability and flexibility, and it’s the only option that works for me. The type of programming I do often calls for a lot of MIDI FX plugins, which carry over to aliased channel strips. By using external instrument channel strips with audio loopback, I enjoy the benefits of audio routing and FX processing in MainStage, while maintaining a stable system free of unncessary Kontakt aliasing.****Hi, I’m Brian and I’m an electronic music designer for Broadway shows and other theatrical productions around the world. If you enjoyed this article, click the ? below to let the world know.