Since publishing my original post about migrating from Netlify to Cloudflare Workers Sites, I’ve made a few tweaks to my deployment process. Instead of building this Hugo site on a free Google Compute Engine VM, I’ve moved the build process to a serverless GitHub Actions workflow. Serverless building was always the goal from the start, but I was too busy to figure out how to set up GitHub Actions during the initial migration from Netlify to Cloudflare.
A few weeks ago, I finally had time to set everything up on GitHub Actions. In this article, I’ll share how I deploy my Hugo-generated static site to Cloudflare Workers Sites with a GitHub Actions workflow.
First off, this article assumes that you already have Cloudflare Workers Sites enabled, and will only cover how to build and deploy with a GitHub Actions workflow. If you’re unsure about how to get started with Workers Sites, feel free to check out my previous post about migrating from Netlify to Cloudflare.
Create a Cloudflare API Token
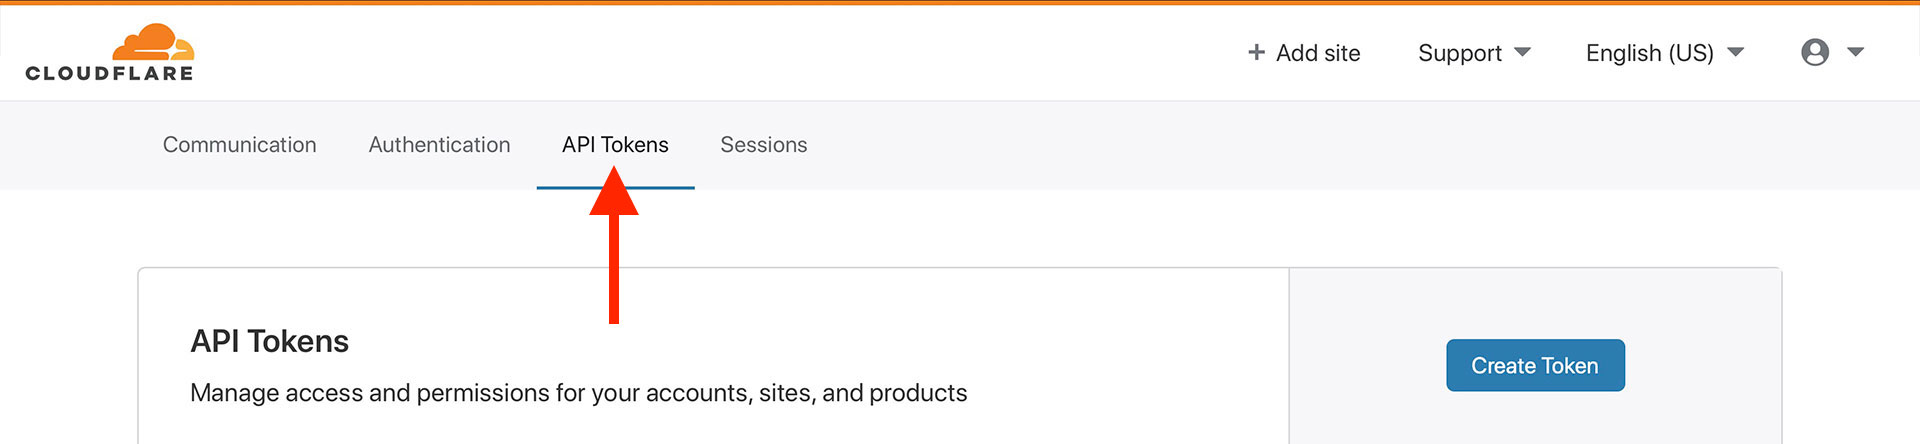
To get started, you’ll need to generate a Cloudflare API token. This API token will be used by GitHub to publish the generated Hugo site to Cloudflare Workers Sites. To generate an API token, go to your Cloudflare profile page, click the “API Tokens” tab, and click “Create Token”.
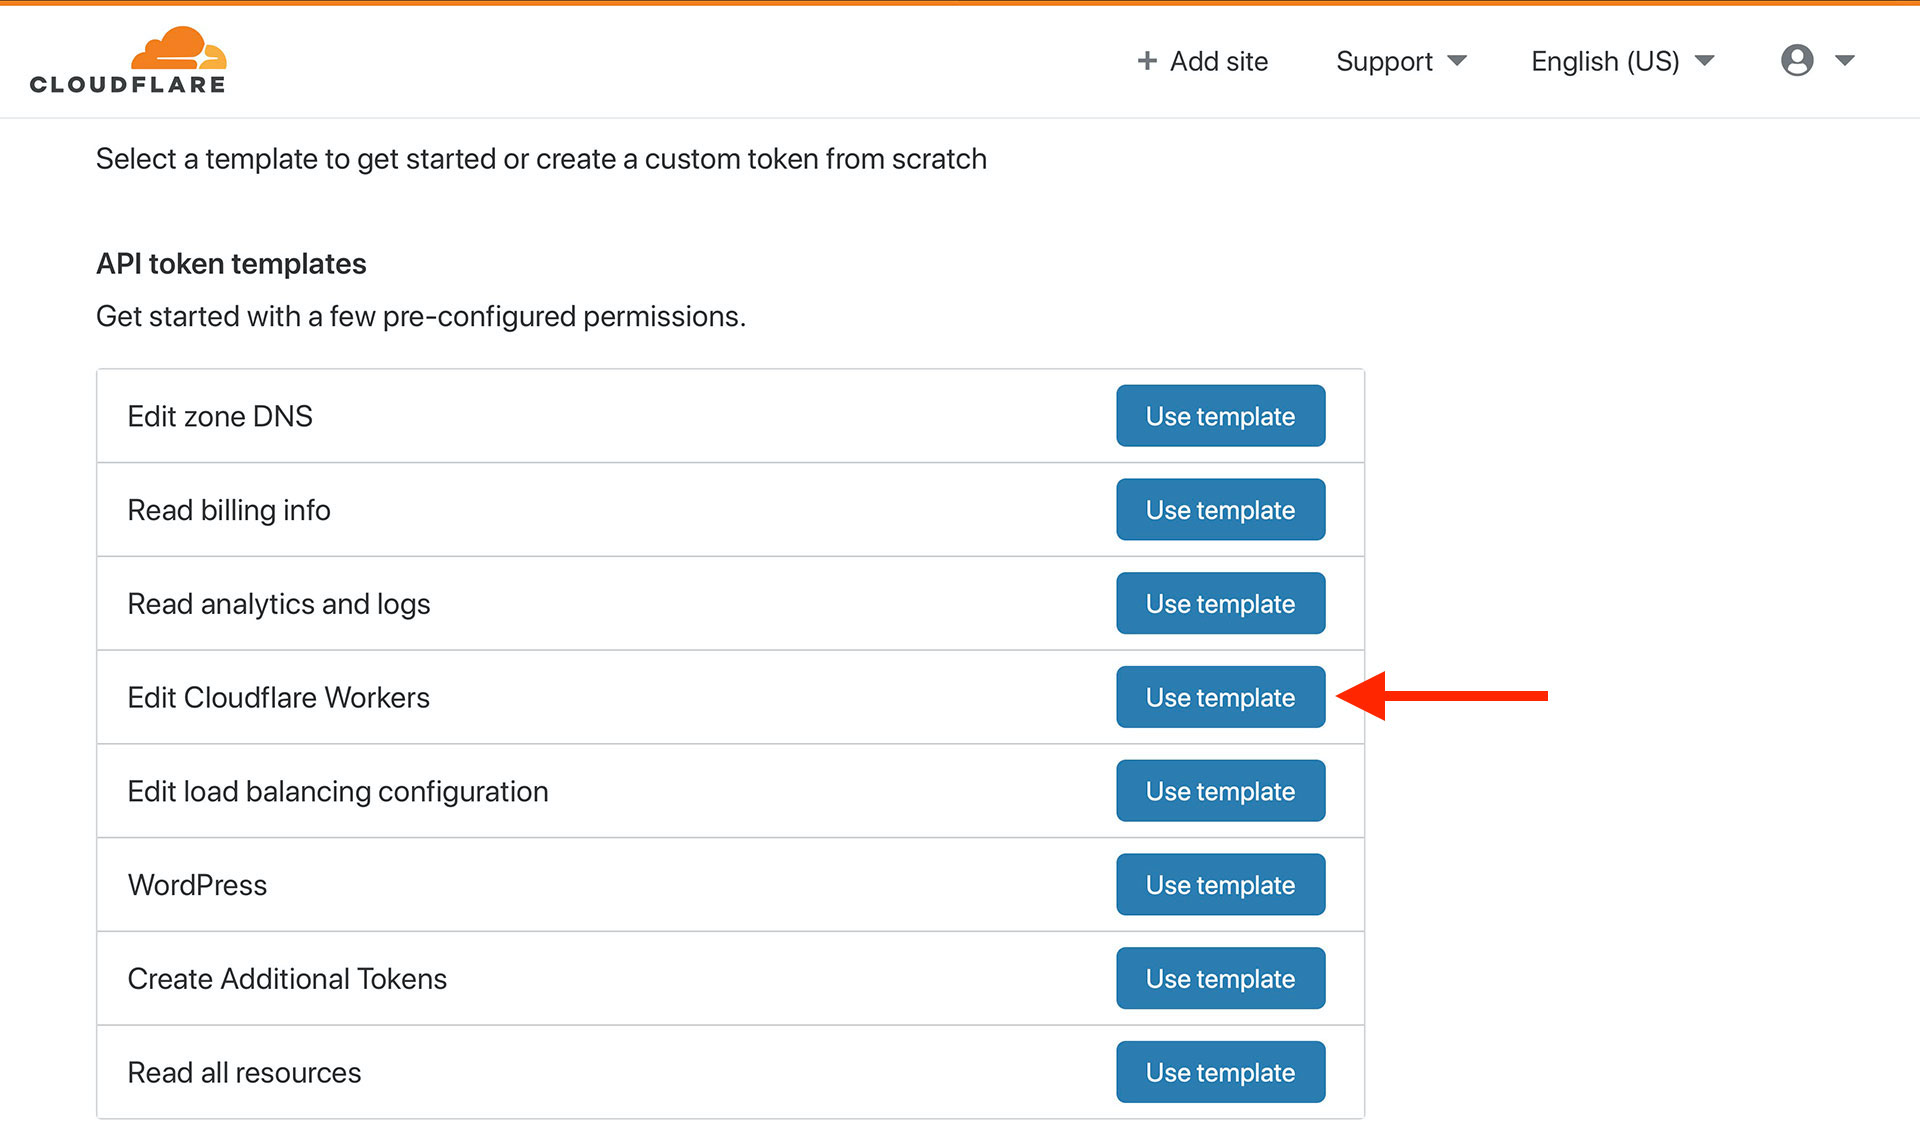
Next, select the “Edit Cloudflare Workers” API token template. This template will pre-populate the token creation form with the necessary permissions and settings for managing a Cloudflare worker.
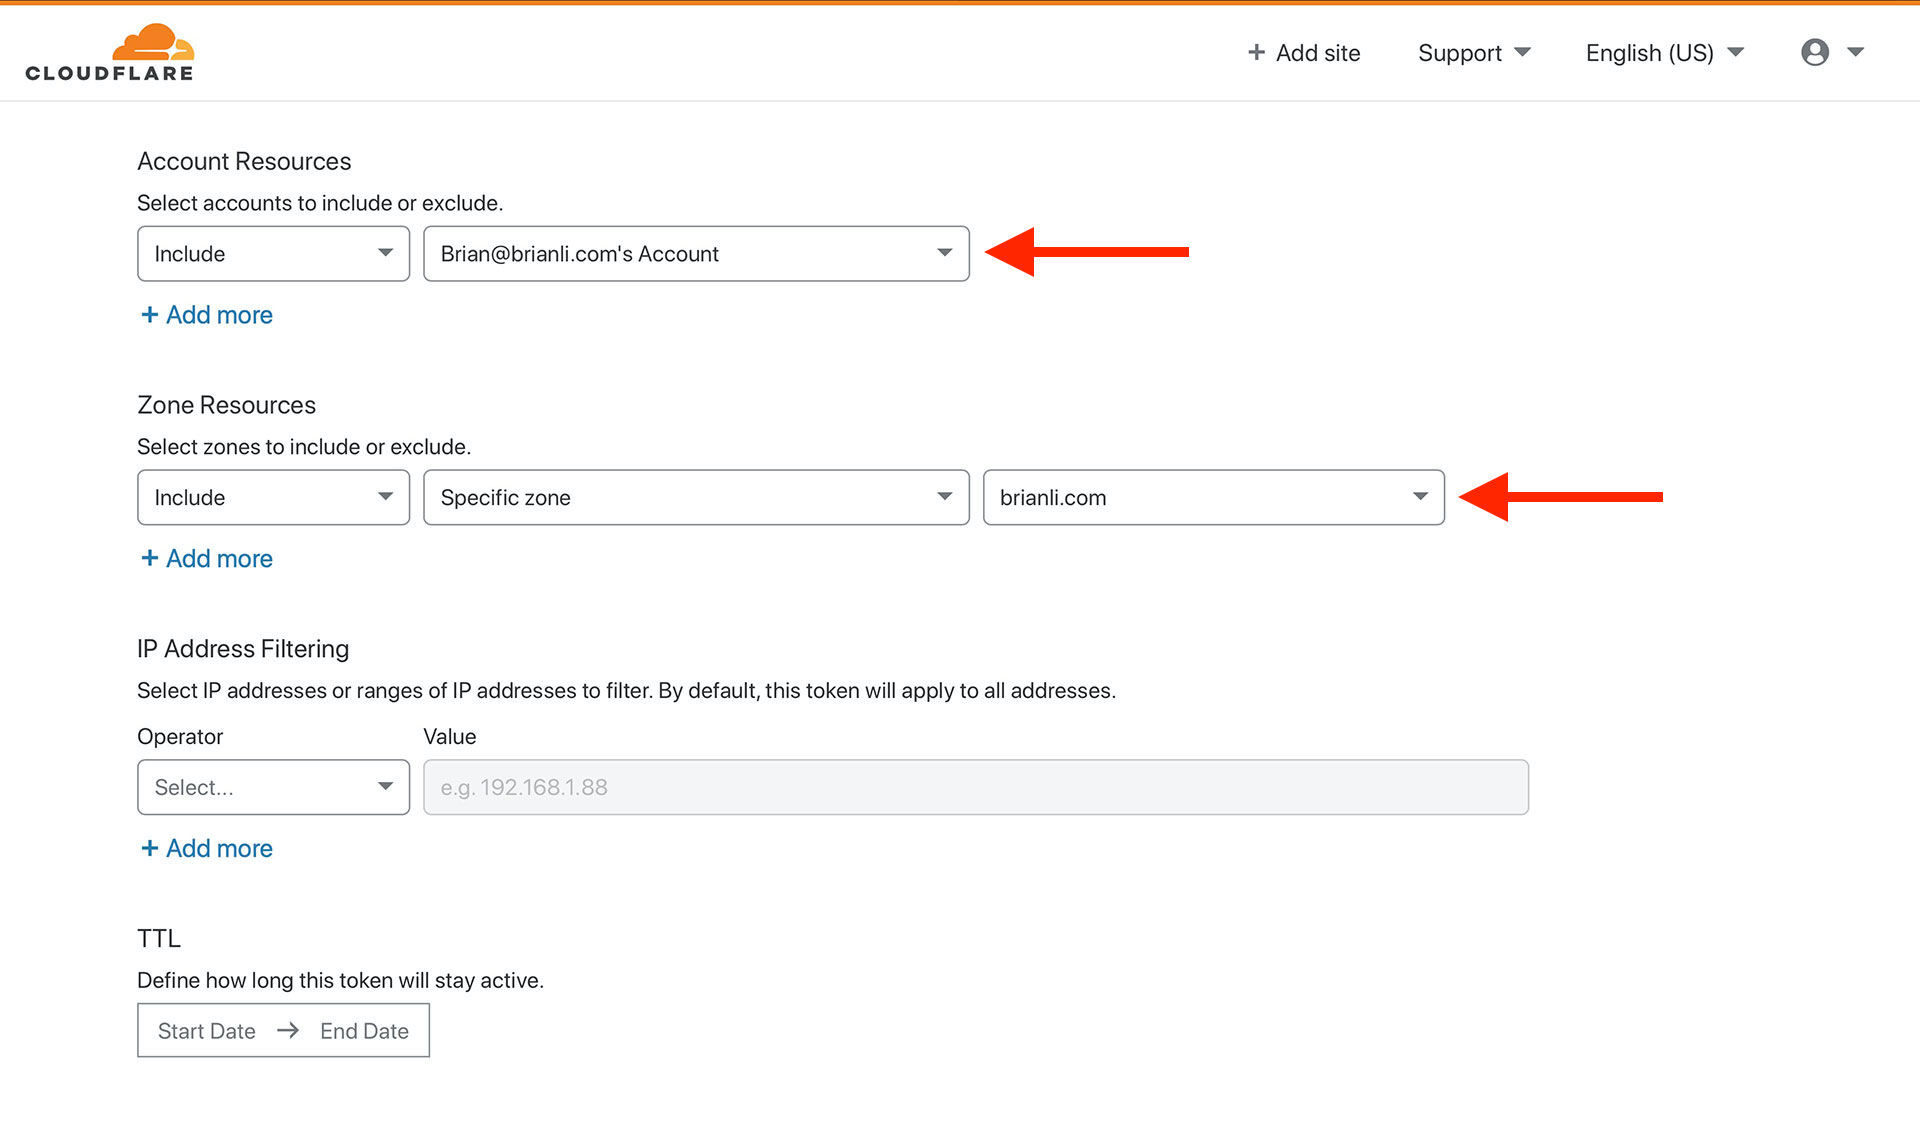
In the token creation form, be sure to specify the “account resource” and “zone resource” that require API access via the token. After you’ve double-checked the settings, go through the confirmation page, and click “Create Token”.
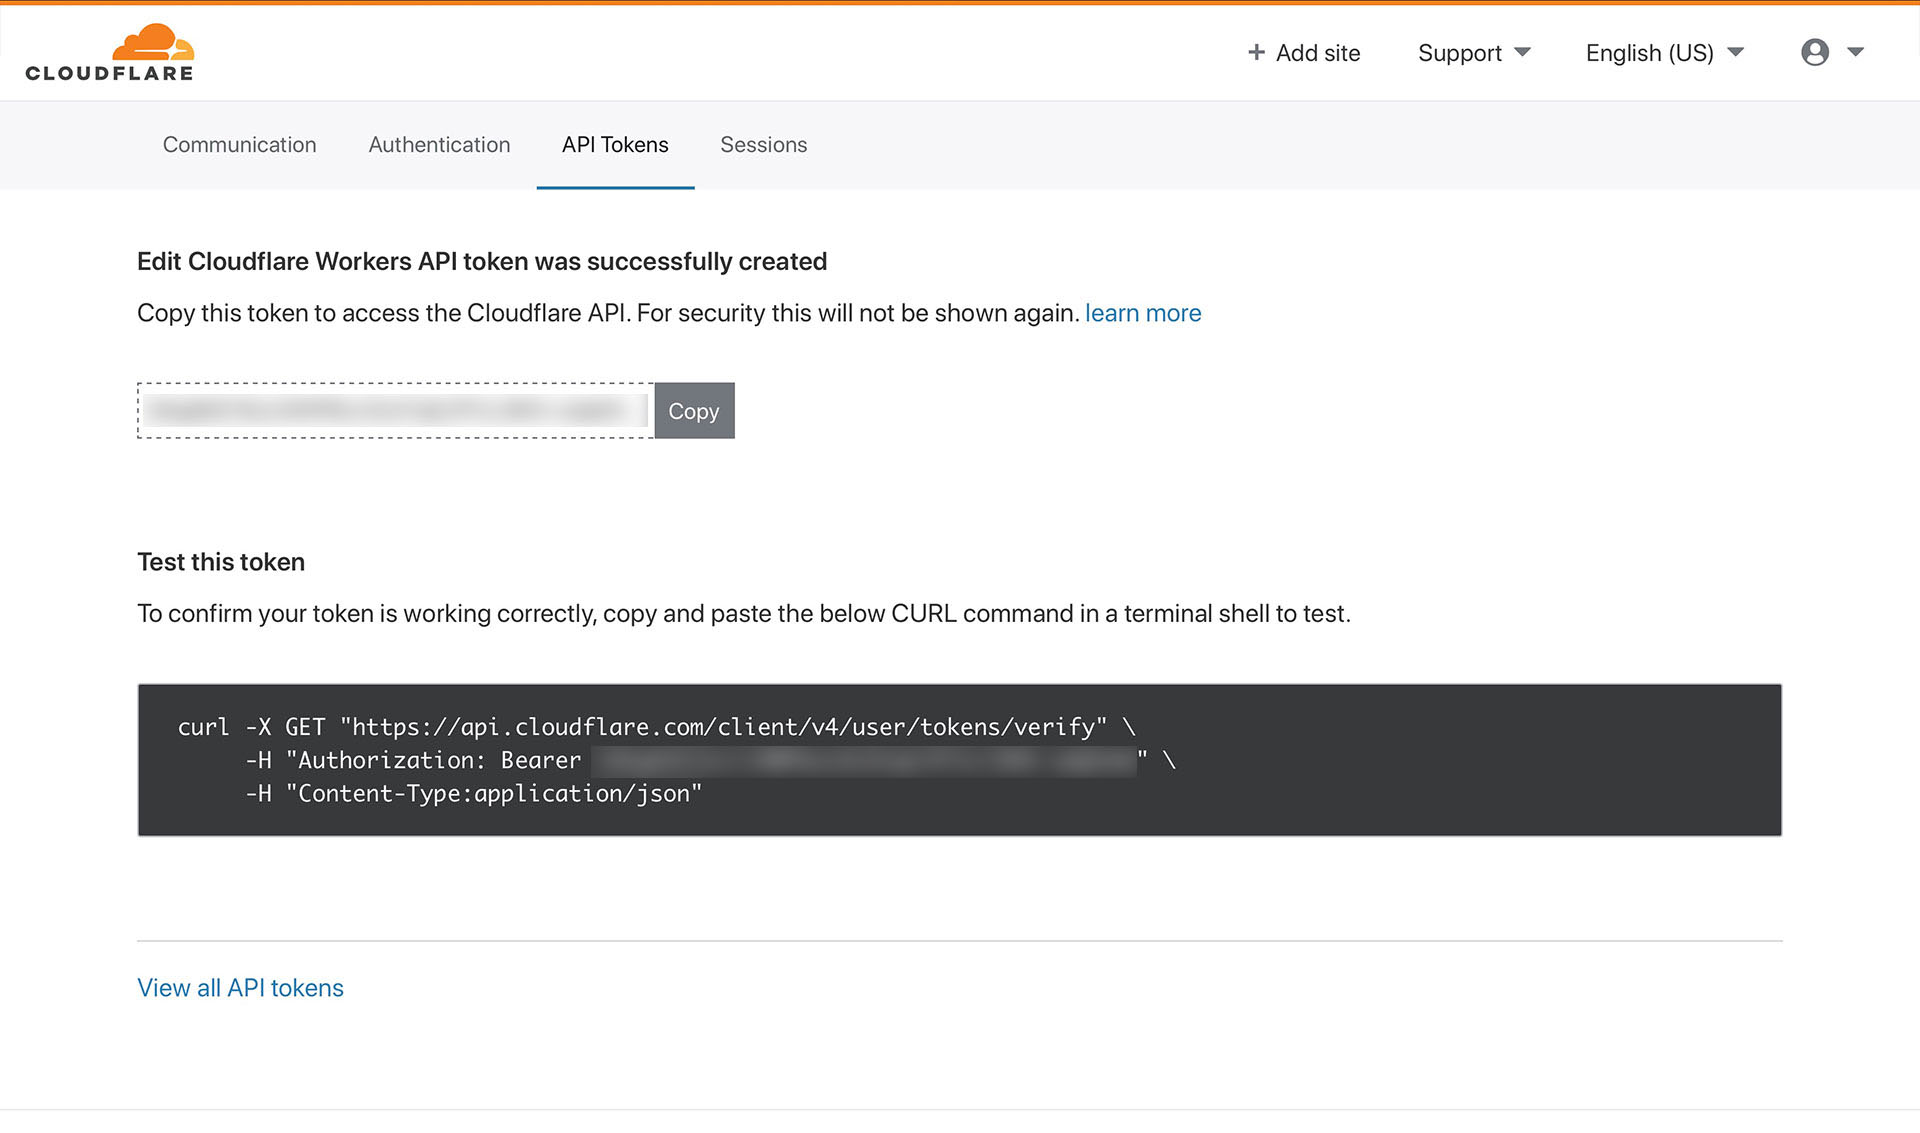
You’ll then be presented with your shiny new API token. Keep the token in a safe place for now, and make sure you don’t share it with anyone!
Next, let’s go over to GitHub and create a GitHub Actions workflow.
Create a GitHub Actions Workflow
A GitHub Actions workflow is a series of commands that run after a commit to a specific branch. In this case, we’ll be building a workflow to build a Hugo site and upload it to Cloudflare Workers Sites.
Before diving into the workflow creation process, let’s first set up a GitHub secret for our Cloudflare API token. When dealing with sensitive information like API keys, it’s best to access them via an environment variable rather than including them within the deployment script in plain text. To create a GitHub secret, go to your repo’s settings page (not the general GitHub settings page), click on the “Secretes” tab, and click “New Secret”.
Next, specify a name for your environment variable. The workflow I’ll be sharing later on uses CF_API_TOKEN for the name, so feel free to use that if you’d like. Under “Value”, paste your Cloudflare API token, and make sure there are no spaces before or after the token.

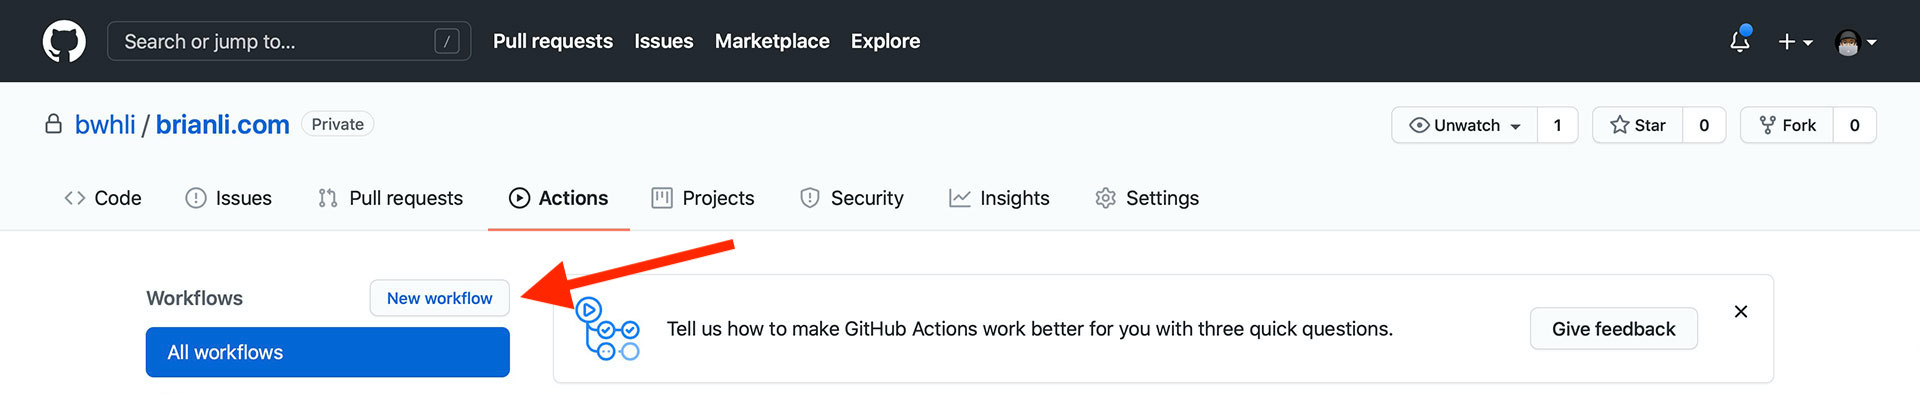
Alright, now we’re ready to create the GitHub Actions workflow. First, go to your repo, click on the “Actions” tab, and click “New Workflow”.
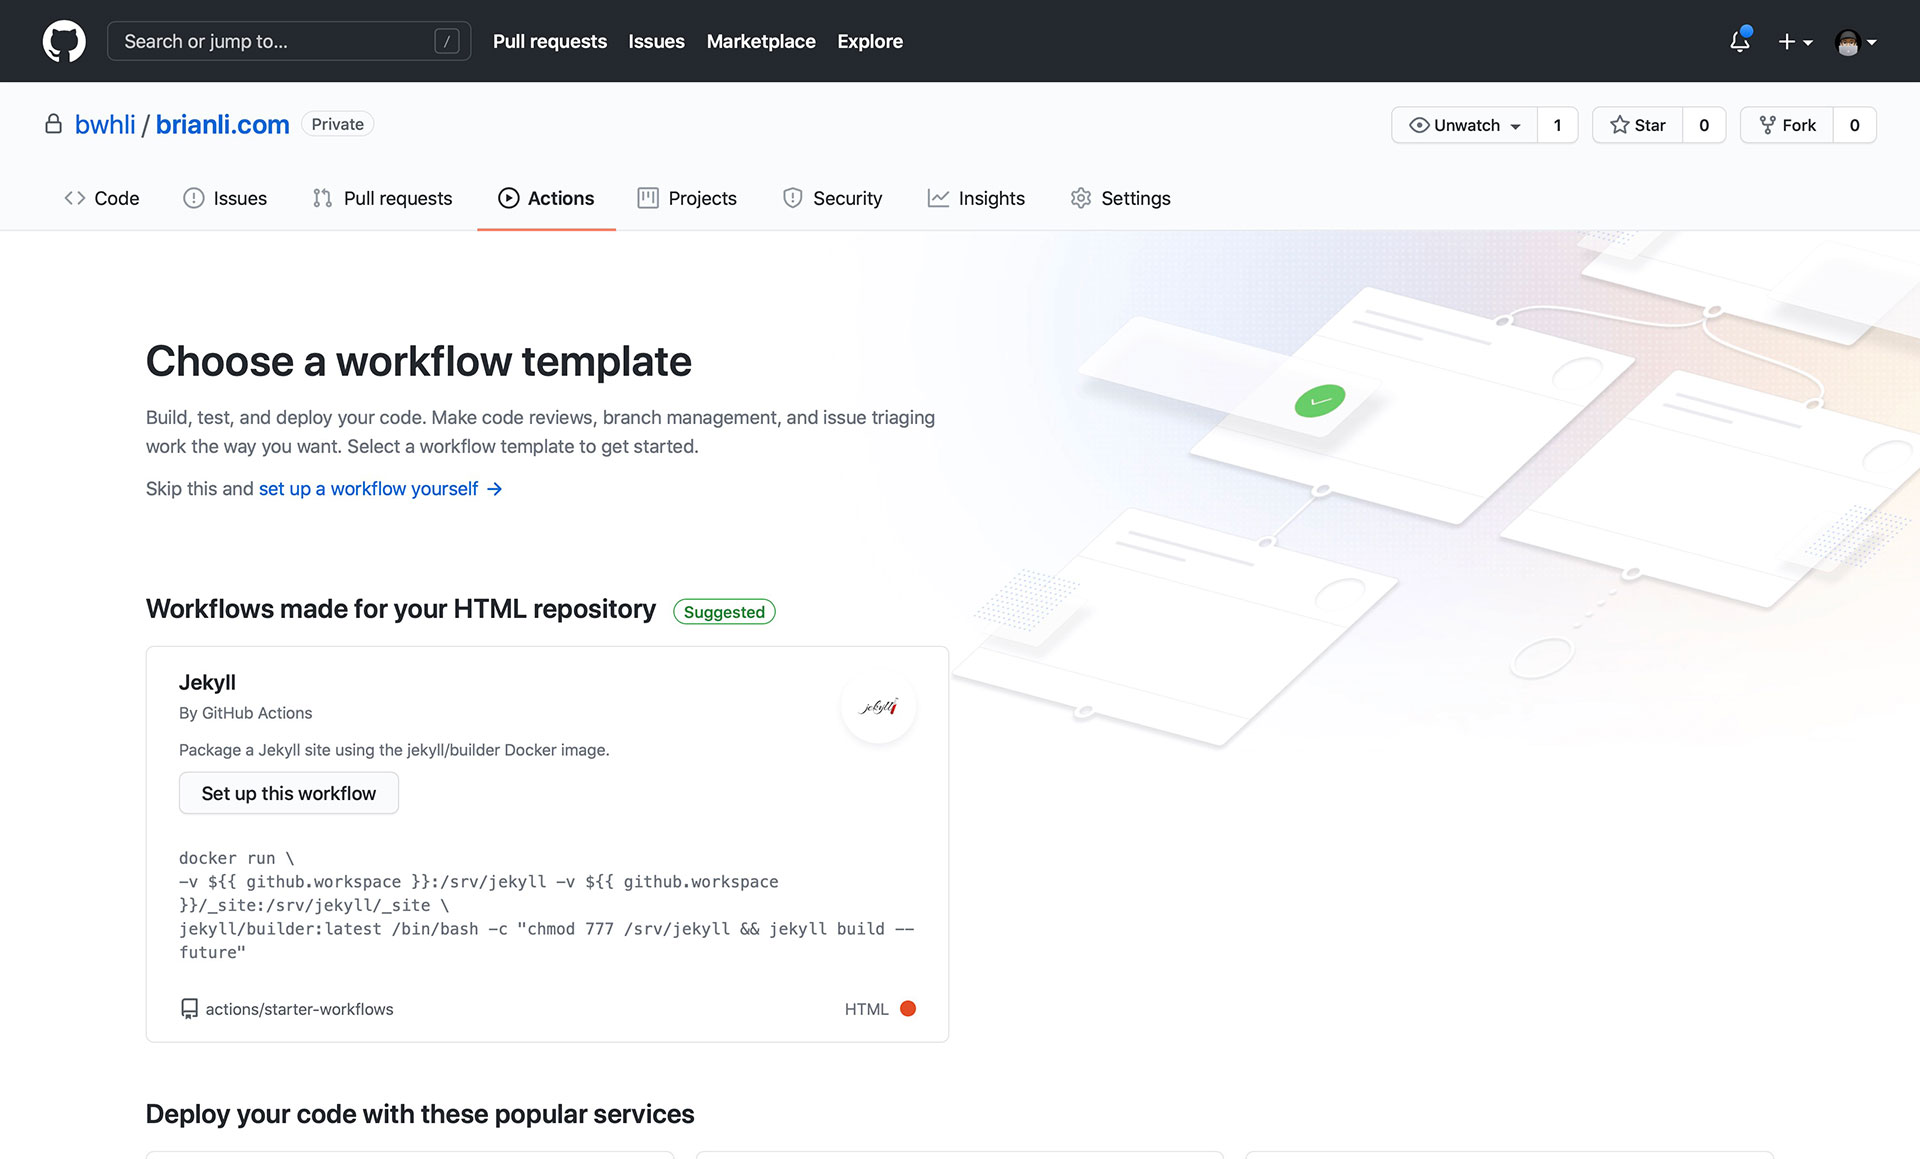
GitHub will bombard you with a bunch of workflow presets, but that’s not what we want. Ignore the suggestions and click “set up workflow yourself”.
Next, specify a name for the workflow (be sure it ends with a “yml” file extension). The name I used for my workflow is deploy-to-cloudflare-workers-sites.yml – very creative.
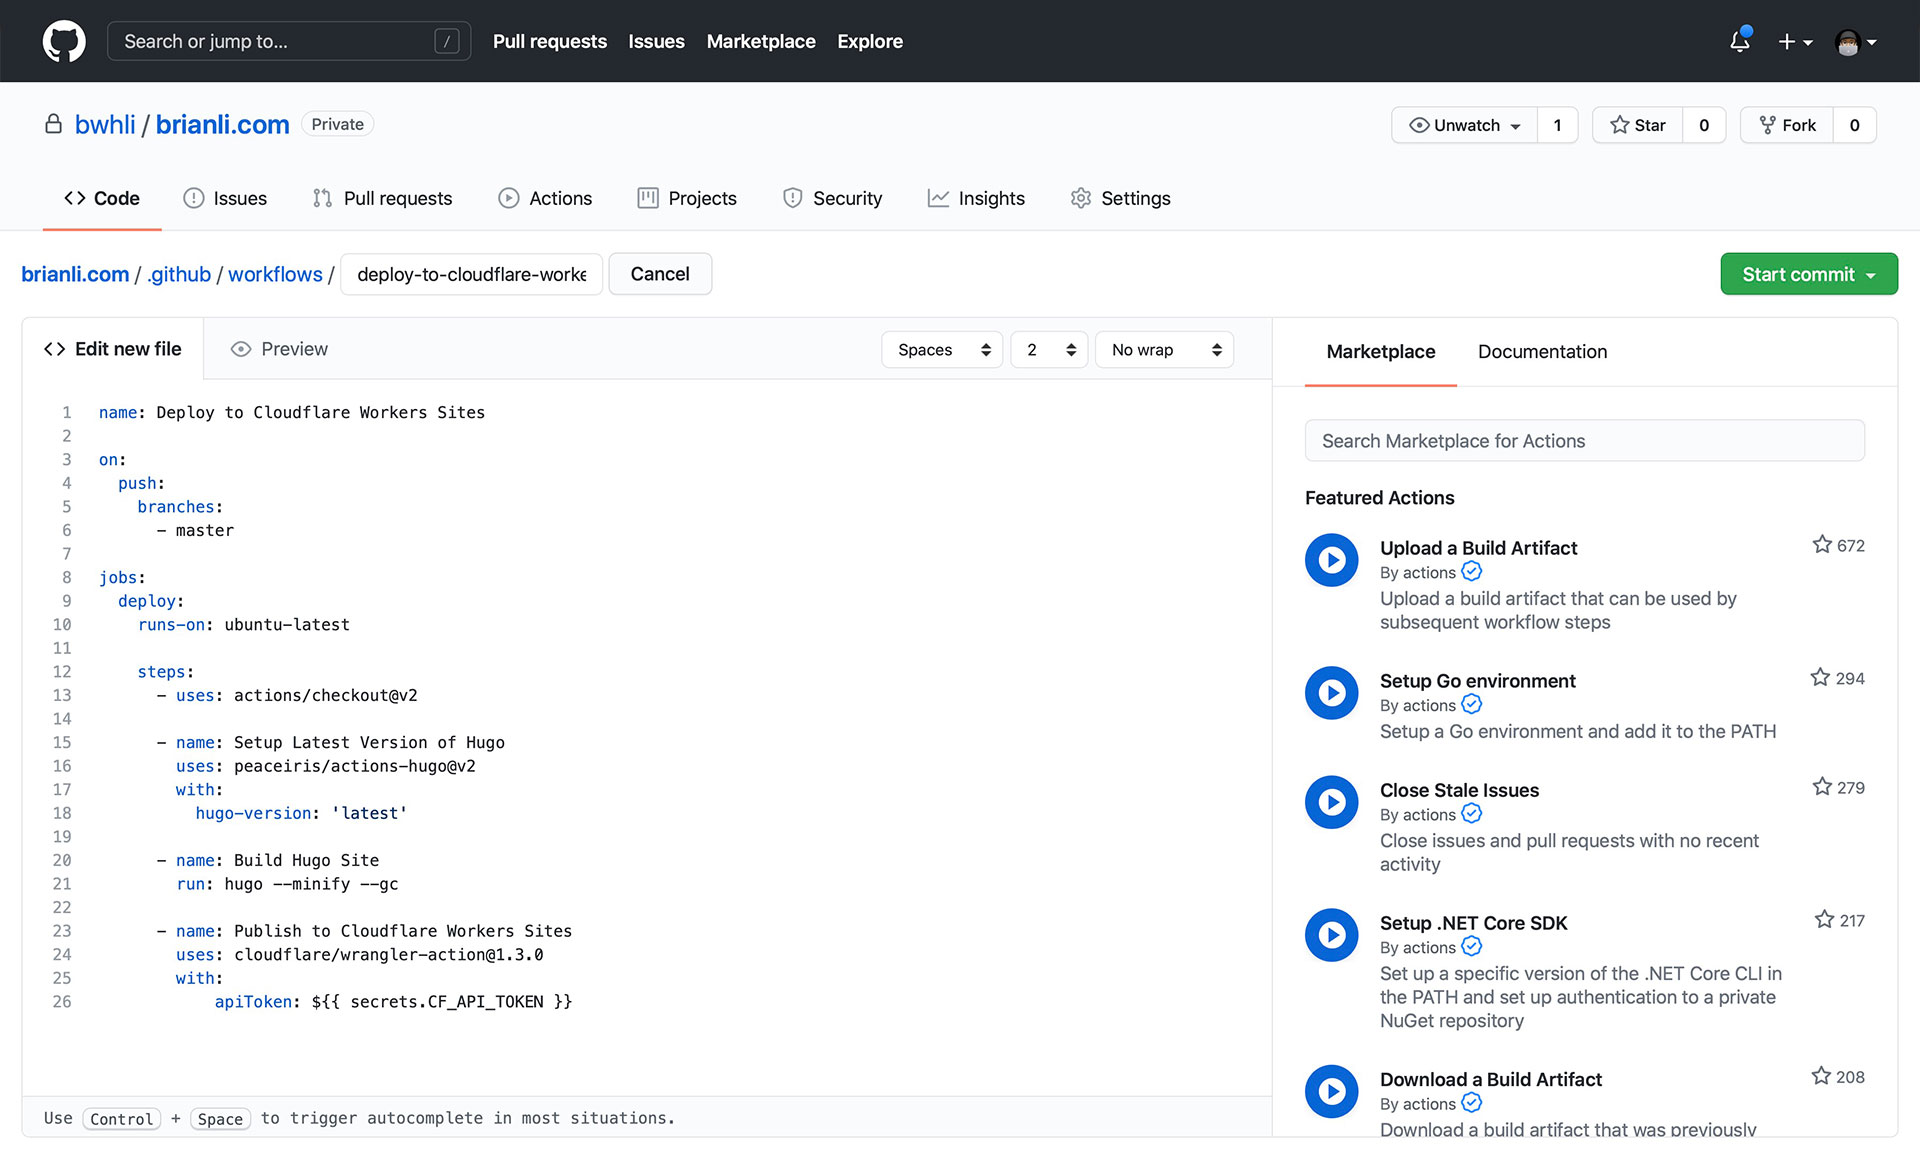
For the body of the workflow, use the YAML below.
name: Deploy to Cloudflare Workers Sites

on:
  push:
	branches:
	  - master

jobs:
  deploy:
	runs-on: ubuntu-latest

	steps:
	  - uses: actions/checkout@v2

	  - name: Setup Latest Version of Hugo
		uses: peaceiris/actions-hugo@v2
		with:
		  hugo-version: 'latest'

	  - name: Build Hugo Site
		run: hugo --minify --gc

	  - name: Publish to Cloudflare Workers Sites
		uses: cloudflare/[email protected]
		with:
			apiToken: ${{ secrets.CF_API_TOKEN }}
- The workflow triggers on commits to the
masterbranch. Feel free to change it to another branch if necessary. - The workflow uses the latest version of Ubuntu for the Linux environment.
- The workflow uses the latest version of Hugo. Feel free to change the
hugo-versionsetting to a specific version of Hugo if needed. - The workflow uses
hugo --minify --gcto build the site. Feel free to change the Hugo build command if you prefer something else. - Notice how the workflow calls
secrets.CF_API_TOKEN. This step uses your Cloudflare API token to upload the generated site to Workers Sites without exposing the API token in plain text.
Finally, click “Start Commit” and GitHub Actions should start building your site. Since Hugo is such a fast static site generator, you should be able to view a GitHub-deployed version of your site within a few minutes. If you have any questions about how to deploy a Hugo site (or any static site for that matter) to Cloudflare Workers Sites with a GitHub Actions workflow, feel free to send me an email or reach out to me on Twitter!